Published Book on Amazon
| All of IOT Starting with the Latest Raspberry Pi from Beginner to Advanced – Volume 1 | |
| All of IOT Starting with the Latest Raspberry Pi from Beginner to Advanced – Volume 2 |
출판된 한글판 도서
| 최신 라즈베리파이(Raspberry Pi)로 시작하는 사물인터넷(IOT)의 모든 것 – 초보에서 고급까지 (상) | |
| 최신 라즈베리파이(Raspberry Pi)로 시작하는 사물인터넷(IOT)의 모든 것 – 초보에서 고급까지 (하) |
Original Book Contents
23.5.5 Learning Python through Game
Raspberry Pi system offers a variety of games by default. Providing games in Raspberry Pi system has another purpose for users as well as for user to enjoy games simply with Raspberry Pi system.
Providing games on Raspberry Pi system has purpose for providing a way to develop the ability to write Python programs through games. To do this, for each game, the system provide an environment that users can interact with games by Python, and users can freely edit program source code for games and execute them.
Games that can be used for Python learning are as follows.
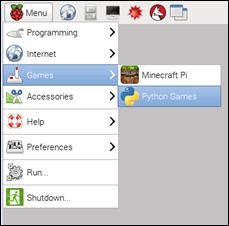
■ Minecraft
■ Python Games
23.5.5.1 Python Games
In the window environment, there is menu [Python Games] on Applications Menu MenuàGames. Here you can run many games developed in Python, at the same time you can see program source code for games, modify them as you like, and execute them.
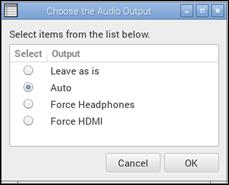
When you run the program, the following confirmation screen appears first. This screen allows you to select audio settings to determine whether to send sound to HDMI or headphones. Select the desired item here and press [OK] button.
Next, a screen showing a list of games to play appears. If you select the desired game from the game list and press [OK] button, it plays the game.
|
|

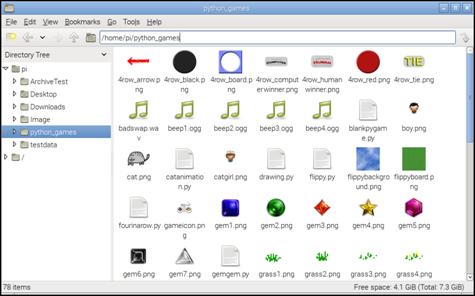
Figure 23‑10 Python Games
Users can enjoy the game freely. The program source code for all games provided here are provided. If you look in "/home/pi/python_games" folder, you will see the source code and related files.
|
|
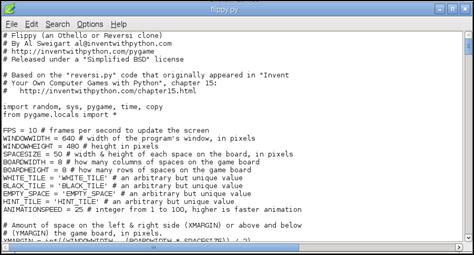
Below is a look at the source code for "Flippy" game through Python's IDLE. Users can learn what the source code of the game is. If necessary, they can copy the source code, modify it, and execute it. If necessary, they can modify the program so that it interact with GPIO or external light is turned on when the game is over.
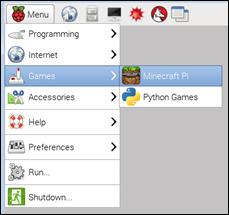
23.5.5.2 Minecraft PI
If you look at Applications Menu Menu àGames in window environment, there is menu [Minecraft Pi]. Here you can enjoy Minecraft game of Raspberry Pi version. Minecraft is a popular sandbox open world-building game. Users can easily learn Python in this game while enjoying game by instructing commands in Python code or writing simple scripts to modify the game contents.
We are not here to explain how to play games. It is our intent to explain how Python is used while adjusting the game with Python.
When you run the program from the menu, the following screen appears. [Start Game] is a game that use can play by himself, and [Join Game] is a game that many people play together on the network.
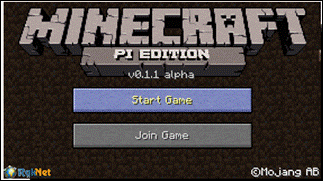
Figure 23‑11 Starting Minecraft
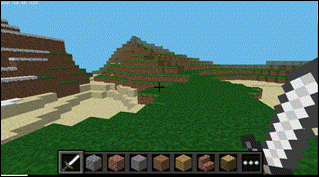
When you start the game with [Start Game], the game starts with the following screen. Once Minecraft is running and "world" is created, press [Tab] button to move the focus away from the game and free the mouse.
|
|
■ Executing Minecraft program in remote connection environment
Note that Minecraft program may not run normally on remote connections. I have searched several sources on the Internet, and it is said to be because remote connection program does not support "directly rendered overlay" function.
Remote access program <RealVNC> recently released a version that supports this function, so you can use it if necessary.
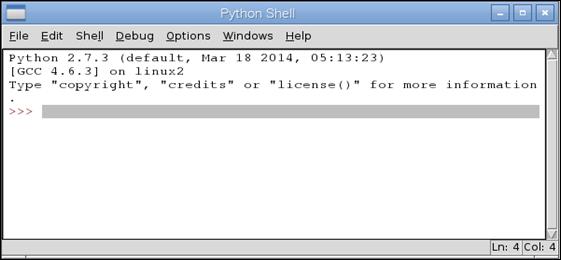
● Running Python Shell Window for Program Interface
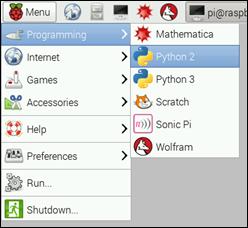
Now we start Python program to connect to Minecraft game and adjust the game. Start Python window using menu [Python 3 (IDLE 3)] in Application Menu Menu à Programming as shown below.
You can type command one by one and run it immediately in the Python Shell window. Also, by opening a new screen using menu File à New window, you can type the entire contents at a time in the blank screen and run it directly, or save it as a file and reuse it.
● Linking Python and Minecraft game
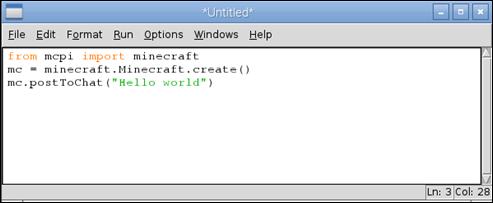
The first thing you need to do to link Python and Minecraft together is to import Minecraft library into Python, connect to the game, and check the connection. Do the following task.
| from mcpi import minecraft mc = minecraft.Minecraft.create() mc.postToChat("Hello world") |
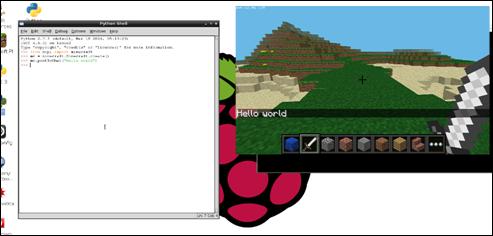
Below is running the command in the Python Shell window.
If the message "Hello world" is displayed on the screen as follows, it is the state processed normally.
● Confirming current location
To confirm current location, run the following command.
| pos = mc.player.getPos() |
The variable "pos" has the current location information. "Pos.x", "pos.y", and "pos.z" are used to obtain coordinates information.
Unlike the above, a nice way to store the coordinates in separate variables is to use Python's unpacking technique as follows.
| x, y, z = mc.player.getPos() |
Now each variable "x", "y", "z" has coordinate for location of player. Variable "x" and "z" are the walking direction (front/back and left/right) and variable "y" is the up/down direction. Note that "getPos()" function tells you the location of player at that point of time. If you moved the location, you need to run the function again to get information about the new location.
● Teleport
Not only can you finding out your current location, but alos you can specify a particular location to teleport to.
| x, y, z = mc.player.getPos() mc.player.setPos(x, y+100, z) |
This sentence will transport player to 100 spaces in the air. This means that you teleport into the sky and fall back to the starting point. Now let's try to teleport to somewhere else.
● Setting a single block
You can place a single block at a given set of coordinates with "mc.setBlock()" function.
| x, y, z = mc.player.getPos() mc.setBlock(x+1, y, z, 1) |
Now a "stone" block appears beside to where you are standing. If it is not immediately in front of you, it may be beside or behind you. Go back to the Minecraft window and move around on the spot with your mouse until you see a gray block in front of you.
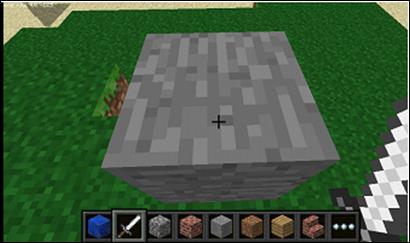
The arguments passed to "setBlock()" function are "x", "y", "z", and id. "x", "y", and "z" indicate the position in the world (we used "x + 1" to specify one block away from the player), id is the type of block we want to create, "1" means "stone". Try other blocks below.
■ Air -- 0
■ Stone -- 1
■ Grass -- 2
■ Dirt -- 3
Now let's use the block shown and change it to something else.
| mc.setBlock(x+1, y, z, 2) |
You can now see the gray stone block changing in front of your eyes.

● Storing block as variable
You can make your code more readable by storing "id" to a variable. "id" can be specified with block, and if you already know the value for "id", you can specify it yourself.
| dirt = block.DIRT.id mc.setBlock(x, y, z, dirt) |
| dirt = 3 mc.setBlock(x, y, z, dirt) |
● Special block
There are blocks with separate properties, like "wool" with additional configuration items for specifying colors. To set these, you can use the fourth optional parameter in "setBlock" function.
| wool = 35 mc.setBlock(x, y, z, wool, 1) |
The fourth parameter "1" changes the color of "wool" to orange. If there is no fourth parameter, the value is set to default zero(0), which means white. The following are values for different colors.
■ 1 -- White
■ 2 -- Magenta
■ 3 -- Light Blue
■ 4 -- Yellow
Try using different numbers to see how block changes. Other blocks that have additional properties is as follows. Please refer to API reference for detailed information.
■ wood -- 17 -- oak, spruce, birch, etc.
■ tall grass -- 31 -- shrub, grass, fern.
■ torch -- 50 -- east, west, north, south, etc.
● Setting multiple blocks
Though you can set a block with "setBlock()" function, you can also fill a volume of space with blocks at a time with "setBlocks" function.
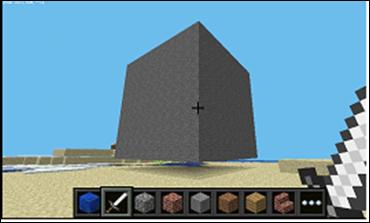
| stone = 1 x, y, z = mc.player.getPos() mc.setBlocks(x+1, y+1, z+1, x+11, y+11, z+11, stone) |
The above code creates a solid stone block of 10 x 10 x 10 cube. You can create a larger block with "setBlocks" function, but it will take more time to create it.
|
|
● Dropping block while you walks
The following code will drop flowers behind you whereever you walk.
| from mcpi import minecraft from time import sleep
mc = minecraft.Minecraft.create()
flower = 38
while True: x, y, z = mc.player.getPos() mc.setBlock(x, y, z, flower) sleep(0.1) |
Now, walk foreward for a moment, turn around and see if there are flowers behind you. Because we used "while True" loop, this behavior will continue forever. To stop, press [Ctrl + C] in the Python window.
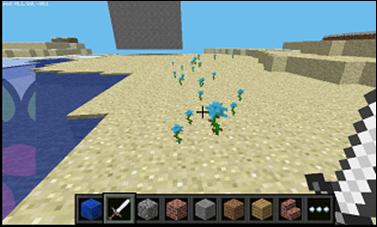
Try to fly in the air and see if flowers are scattered in the air.
What if we want to drop flowers only when we walk on grass? If you want to know what type the current block is, use "getBlock" function. This will tell you the block which you are standing in. (It will be "0" in the air block).
| x, y, z = mc.player.getPos() # player position (x, y, z) this_block = mc.getBlock(x, y, z) # block ID print(this_block) |
We want to know the type of block we are standing on. To do this, if you subtract 1 from "y" value and then use "getBlock()" function, you can determine the type of block we are standing in.
| x, y, z = mc.player.getpos() # player position (x, y, z) block_beneath = mc.getBlock(x, y-1, z) # block ID print(block_beneath) |
The above sentence tells us "ID" of the block in which we are standing. With loop statement, try to continuously print ID of the block that we are standing in.
| while True: x, y, z = mc.player.getPos() block_beneath = mc.getBlock(x, y-1, z) print(block_beneath) |

We can use "if" statement to determine where we plant flower at the present. The following code drops flowers only when type of the block is "grass".
| grass = 2 flower = 38
while True: x, y, z = mc.player.getPos() # player position (x, y, z) block_beneath = mc.getBlock(x, y-1, z) # block ID
if block_beneath == grass: mc.setBlock(x, y, z, flower) sleep(0.1) |
Next, if we're not standing in "grass", it changes it to "grass".
| if block_beneath == grass: mc.setBlock(x, y, z, flower) else: mc.setBlock(x, y-1, z, grass) |
Now while walking forward, if you are walking on "grass", you will be able to drop flowers behind you. If the current position is not "grass", its position will be changed to "grass". When we turn around and go back later, the place was already changed to "grass", and this time the flowers will be sprayed.
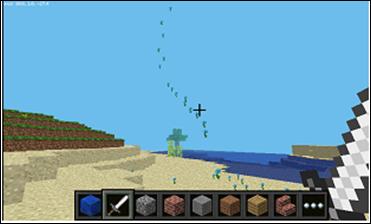
● TNT blocks
Another interesting block is "TNT". To create a normal "TNT" block, use the following statement.
| tnt = 46 mc.setBlock(x, y, z, tnt) |
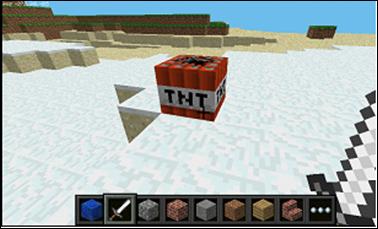
But, the "TNT" block in this state is quite tedious. So let's apply "1" to the data. Then now, select "sword", left click on the "TNT" block. Then it will be activated and explode in a few seconds.
| tnt = 46 mc.setBlock(x, y, z, tnt, 1) |
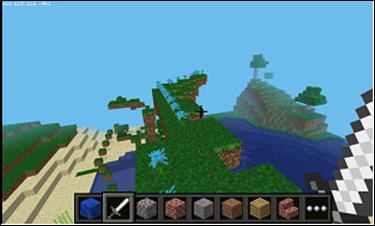
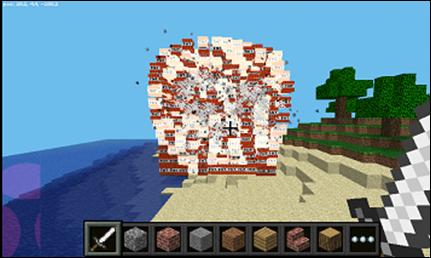
Next, let's create a big cube of "TNT" block.
| tnt = 46 mc.setBlocks(x+1, y+1, z+1, x+11, y+11, z+11, tnt, 1) |
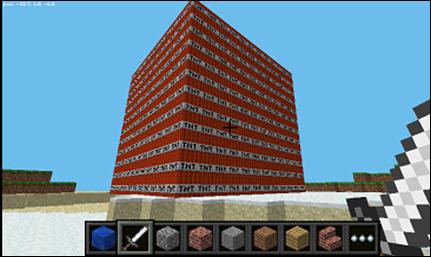
Now, a large cube of TNT block is displayed. Go and activate one of blocks and run away to see what happens. It'll be really slow to render the graphics as so many things are changing at once.
● network game
If multiple people have their Raspberry Pi connected to a same LAN, they can participate and play in the same Minecraft world. Each player can see each other in the Minecraft world.
● API reference
For a more extensive document for function or full list of block ID, please see API reference material from the followings:
■ http://www.stuffaboutcode.com/p/minecraft-api-reference.html